Iceturf Posted April 4, 2009 Report Share Posted April 4, 2009 (edited) DIY Moss Wall: In my opinion, aquarium moss is very interesting. You it mould them and prune it to perfection. For instance, you can use it on driftwood to make a living sculpture. However, I think that a living wall of moss is just as cool and effective for housing small species. And making said wall is cheap: 1, You will need: mesh(something like a nylon mesh or DIY slider door mesh replacement, rinse it out), moss, possibly silicon or tie down straps or fishing wire, suction cups and preferably an aquarium to put the end result in (I hear some aquarium mosses aren’t necessarily aquatic…) 2, Since the mesh will be the spine of the operation, you will want to cut out the general shape or area you want the moss to be like or grow from. (i.e. shape of back wall) However, you will want this to be contained. So, either cut out two equal pieces or one piece that is 2x longer than need be. Essentially, the moss will cradled inside an ‘envelope’ of mesh. (keeps fish out and allows the moss to grow through, towards the light) 3, Now to keep the wall in place, you will want to cut small holes for the suction cups in the middle or near corners or edges (just big enough to squeeze the hold tip of the suction cut through) of one of the sides. -Depending on how many suction cups you have, place them maybe 8 inches apart along the edges with one or two in the middle -You could silicon the wall in place… It would just be harder to adjust placement….. -I don’t have more than one to spare so I’ll make do 4, Take the side that isn't ‘'holy' ‘ and place moss evenly (and sparsely) on it. -If your moss floats or ‘moves around’ easily, take the tie down straps or fishing wire and use them to keep bunches in place. If you do that, I suggest you attach the moss to the suction cup side 5, Sandwich the moss between the two pieces/sides and flatten appropriately (you don‘t want part of the moss or mesh to be bulgy). 6, Use the tie down straps or silicon or fishing wire to seal up the shape (along edges, possibly one every few inches). 7, Place in aquarium (preferably an empty one) as wanted and let grow for the next few months. 8, Quickly leave the room and let someone else clean up the mess Notes: Possibly use a few different types of moss (fast at bottom and slow growing at top). To this end, I found that my riccia floated to the top, then overgrew all below it and then made a thick carpet. (good for making carpets, bad for being a living wall.) -I submerged the bottom of my wall under the substrate, but this ended up being a crap trap. I suggest that you either have some substrate carpet plants grow in that area or you raise it up above the substrate and cut holes in the bottom to let the crap out. (maybe direct some flow in that direction) -You might be able to aid moss growth by providing it with some time release fertilizer capsule attached to the interior of the wall -You could provide shrimp with excellent cover with this wall -To boost growth, you could even put in a DIY yeast thing with the output coming up along the wall. -Could be used to hide tank equipment, so plan and leave room to add stuff -Unlike what I did, I bet this would look really good if you did this when setting up an empty tank and leaving it grow during the 2+ week cycle. For the first while, this wall may not look like much, but give it time and my photo's give this project no justice. If that doesn’t help, try this one out (slightly different): http://www.aquarticles.com/articles/plants..._Moss_Wall.html Edited April 5, 2009 by Iceturf Quote Link to comment Share on other sites More sharing options...
firestorm Posted April 5, 2009 Report Share Posted April 5, 2009 8, Quickly leave the room and let someone else clean up the mess Good suggestion, if only it were that easy -roll- Like how you used suction cups, I never thought of that before. But just a concern, is the holes in that mesh large enough that the moss really grows in well? Quote Link to comment Share on other sites More sharing options...
Iceturf Posted April 5, 2009 Author Report Share Posted April 5, 2009 8, Quickly leave the room and let someone else clean up the mess Good suggestion, if only it were that easy -roll- Like how you used suction cups, I never thought of that before. But just a concern, is the holes in that mesh large enough that the moss really grows in well? Hmm, I haven't noticed my riccia being hindered, but I suppose it would help to have large holes (specifically for moss like pella and christmas moss) Quote Link to comment Share on other sites More sharing options...
firestorm Posted April 5, 2009 Report Share Posted April 5, 2009 That's what I was thinking. I guess you can get mesh that comes in different sizes. I am guessing you got yours from the hardware store? Craft stores might also have some, I wouldn't mind trying out a moss wall. You have inspired me Quote Link to comment Share on other sites More sharing options...
Lance Posted April 5, 2009 Report Share Posted April 5, 2009 Been reading on moss walls that a screen with 8mm holes is good. Quote Link to comment Share on other sites More sharing options...
Kayen Posted April 5, 2009 Report Share Posted April 5, 2009 Hm i think it would help to have the moss closer together, because how you have it, there will be uneven growth of the moss within the mesh, like what happened with one of my walls in the past . Quote Link to comment Share on other sites More sharing options...
corrosionjerry Posted April 5, 2009 Report Share Posted April 5, 2009 I like the look of moss walls... I do prefer one type of moss however and the type that looks best to me for this purpose is Java moss Thanks for posting your ideas and aproach to setting up the wall... good job Quote Link to comment Share on other sites More sharing options...
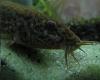
Iceturf Posted April 5, 2009 Author Report Share Posted April 5, 2009 (edited) That's what I was thinking. I guess you can get mesh that comes in different sizes. I am guessing you got yours from the hardware store? Craft stores might also have some, I wouldn't mind trying out a moss wall. You have inspired me Yea, mine was originally from a hardware store, but I'm not sure if it comes in 8mm as reccomended by Lance.... Anyone know a good source? -- Really wide apart mesh Lumpy growth may easily be the outcome, I should have harvested more riccia before starting to get a better coverage. -- Hmm java moss, I'll have to try that. --- Interesting Christmas moss, without any mesh This is the outcome of my older moss wall that didn't have two sides or secured moss. As a result, it floated to the top Riccia grew through well, but I should find wider mesh and try it with Java moss. Edited April 5, 2009 by Iceturf Quote Link to comment Share on other sites More sharing options...
firestorm Posted April 5, 2009 Report Share Posted April 5, 2009 I was thinking it would make a great project for a flame moss wall Now that stuff is cool. I am sure your local craft store would probably carry similar screening with larger holes. I will check it out and see what I can come up with.....but now where am I going to find that much flame moss lol. Just another question, what exactly do you use the zip ties for? is it just to hold the mesh together? I was thinking you can easily use fishing line and weave along the edges and in around the moss clumps, although it probably would take longer but at least you won't see it compared to the zip ties. Quote Link to comment Share on other sites More sharing options...
jvision Posted April 5, 2009 Report Share Posted April 5, 2009 (edited) My first moss wall was made w. cork - I just set it inside the back of the tank, then stapled moss and fern to the cork wall. It grew in w/o hinderance. BTW, great tutorial. Edited April 5, 2009 by jvision Quote Link to comment Share on other sites More sharing options...
Iceturf Posted April 5, 2009 Author Report Share Posted April 5, 2009 (edited) I used zip ties to keep the moss in place and to hold the mesh together, partly because it was easy and partly because I had it on hand. But your right, fishing wire would do both jobs more effectively... -- JVision, excellent idea, but how did you keep the cork (corkboard I would imagion?) sunk? Edited April 5, 2009 by Iceturf Quote Link to comment Share on other sites More sharing options...
firestorm Posted April 5, 2009 Report Share Posted April 5, 2009 cork board sounds like a great idea too Jason, but yeah how did you get it to stay submerged without floating? Quote Link to comment Share on other sites More sharing options...

Recommended Posts
Join the conversation
You can post now and register later. If you have an account, sign in now to post with your account.