Gnaw Posted December 29, 2008 Report Share Posted December 29, 2008 Boom, First I would like to congratulate you on your success thus far, for taking on such a massive feat. Your work and effort are truly inspiring and the results are beautiful. Well done. I started reading the posts from the first page and when I arrived to the point when you first posted the pictures of the aquarium with the lights on I was over-come with a sense of awe and serenity. I could sit before that monolithic structure for hours on end and feel at ease. What a site! I'll be sure to ask you and the other members of this wonderful community plenty of questions when its my turn. For now, you and those who assisted you have my utmost respect. Link to comment Share on other sites More sharing options...
letsgofishn Posted December 30, 2008 Report Share Posted December 30, 2008 Alright, now I gotta fix something and was wondering the best way to do it. For the second time, today I found a fish in my sump. I guess it somehow got over the overflow and swam into the Durso standpipe and swoosh, down he went into the sump. Fortunately this one was still alive, unlike the little petricolas that earlier got stuck in the filter media and perished. Anyway, I was thinking of either adding some screen or eggcrate over the overflow, but was concerned that this may make maintenance a bit more of a pain. The other thing I though of was just to put same screeen or eggcrate over the "entrance" to the durso standpipe, but this may get clogged up and block flow. Other options or ideas??? Thanks Boom :boom: Hey Ryan, You have probably already seen this, but http://www.dursostandpipes.com/?page_id=31 Cheers!! Link to comment Share on other sites More sharing options...
Boom Posted December 30, 2008 Author Report Share Posted December 30, 2008 Gnaw, thank you for the very kind words. Let me know anytime you need some help or advice. letsgofishn, that is almost exactly how the overflow box already is. But somehow the fish are getting OVER the overflow and down into the sump thru the durso. I'm gonna try just eggcrate first. I don't have any fish small enough to fit between the Squares. Boom :boom: Link to comment Share on other sites More sharing options...
Boom Posted January 5, 2009 Author Report Share Posted January 5, 2009 Just a quick update. Instead of the eggcrate what I did was cut a piece of acrylic the size of the intake hole on the durso standpipe. I then drilled a bunch of 1/4" holes in it for water flow, then siliconed it over the intake. This won't prevent fish from getting into the overflow, but it will stop them from getting sucked down into the sump. Sorry I didn't take pics, hope my explanation makes sense. I have a few other woodworking projects to finish up, then hopefully I'll get those shelves done and update with pics soon! Boom :boom: Link to comment Share on other sites More sharing options...
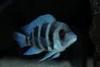
mikeymik'd Posted January 8, 2009 Report Share Posted January 8, 2009 That is in fact a Ruby Red Peacock. He was the boss man in the 55, but now? Not so much! Ha ha.I'm gonna do some more research on the floating poo issue. I'm not sure that just blowing it around more is the solution I need. There is tons of flow already with my 1900gph pump pushing thru the 2 spraybars I set up. And they're adjustable to point at different angles. It's just not getting enough to the top off the overflow box to get sucked down to the sump. Sorry if I missed it but what was your solution to the "poo issue"? And of course did it work? Link to comment Share on other sites More sharing options...
Boom Posted January 9, 2009 Author Report Share Posted January 9, 2009 I ended up adding two powerheads, one to each back corner. They are the type that you can add a sponge to the intake, so that it collects and filters as it moves the water. It has certainly helped, they collect a fair amount of "debris" from the water. I also just finished making the two lids for my sump. They are made of 1/2" BB plywood and acrylic. I will take some pics and post them soon. Boom :boom: Link to comment Share on other sites More sharing options...
Boom Posted January 11, 2009 Author Report Share Posted January 11, 2009 Alright, here are some pics of the lids for the sump, as promised. They are made of 1/2" BB (Baltic Birch) plywood. This is a cabinet grade plywood which has far more plys (layers) then regular plywood (11 plys, as opposed to 5 or 7). This makes it more resistant to warping, something I thought would be a benefit in a humid application such as this. All sides and edges of the wood are painted with a water and mildew resistant primer and paint. The underside of the wood (closest to the water) has a piece of acrylic cut to size, screwed and siliconed to the wood, with silicone covering the countersunk screw heads to prevent rust. The lids are a nice tight fit around the plumbing. You can see I have a small piece of scrap acrylic sitting over the slots at the back required to slide the lid around the plumbing. This has GREATLY reduced the amount of evaporation from the sump, humidity in the sump cabinet, the sound and the smell. As always, questions comments, concerns are welcome. Boom :boom: Link to comment Share on other sites More sharing options...
Fishful Thinking Posted January 11, 2009 Report Share Posted January 11, 2009 How much water were you losing due to evaporation? Link to comment Share on other sites More sharing options...
Boom Posted January 11, 2009 Author Report Share Posted January 11, 2009 With no lid at all, I figured I was losing about 5 gallons in 3 or 4 days time. With a sump set up like mine, the display tank level doesn't ever change, you notice the evaporation in the sump. With having the heater and the submersible pump there, you have to be careful that the water level doesn't get to low. The lids seem to help alot. Of coarse the main tank already has tight fitting glass lids, so I should loose very very little now. Boom :boom: Link to comment Share on other sites More sharing options...
Slough Shark Posted January 11, 2009 Report Share Posted January 11, 2009 Sounds like a good modification. Good information to know... Link to comment Share on other sites More sharing options...
t-man Posted January 11, 2009 Report Share Posted January 11, 2009 (edited) I used plexi-glass lids on my 120 gallon sump and it helps with the evaporation. Helps with the noise of the water flow in the sump too! Edited January 11, 2009 by t-man Link to comment Share on other sites More sharing options...
Boom Posted January 13, 2009 Author Report Share Posted January 13, 2009 It definitely helps with the noise. I still had a problem with the noise from the durso standpipe though. No matter what I did it seemed I couldn't stop the loud gurgling noise. So I set out to fix it, permanently. The problem was caused by the size of the breather hole in the top. The way the durso was set up, the hole size was not adjustable. Here is how it was: I now made it like this: With this modification to allow an adjustable air hole: I had great success and can't believe how much quieter it is now! I'm very happy with it. Boom :boom: Link to comment Share on other sites More sharing options...
Gnaw Posted January 15, 2009 Report Share Posted January 15, 2009 Nice job Ryan. I can't believe you where losing that much water from the sumps while they where somewhat enclosed within the stand. I must admit I am a little intimated with the construction of a sump, seems like a lot of "fine-tuning" and not as cut and paste as I thought. Link to comment Share on other sites More sharing options...
4runr Posted January 24, 2009 Report Share Posted January 24, 2009 What size holes did you drill in the top of the durso? Looks like 1/4"?? I'm trying to solve a similar problem at the moment. Link to comment Share on other sites More sharing options...
Boom Posted January 24, 2009 Author Report Share Posted January 24, 2009 I did use a 1/4" hole, just one hole thru both parts. The cap is turned so that the holes are almost lined up, but not quite. That seems to give me the best air flow with the least amount of noise. Keep playing with the size of the holes and the degree that they are lined up. It greatly depends on the size of your pipes, the amount of flow you have, etc. The smallest change can make a big difference. Boom :boom: Link to comment Share on other sites More sharing options...

Recommended Posts